当我们安装主题和插件时,都会向…

- 使用LAMP在Ubuntu上本地安装WordPress
我们已经介绍了如何在Mac和Windows环境中安装WordPress 。那么,为什么我们最喜欢的基于Linux的操作系统却被排除在外呢?这是一个教程,将向您展示如何在Ubuntu上安装WordPress。请注意,此安装对所有版本的Ubuntu(包括10.02 LTS和更高版本)均有效。(如果您使用的是旧版本,则该升级了!)
在安装过程的大部分时间内,我们将使用一个出色的基于终端的编辑器Nano。您可能已经安装了它。如果您没有安装,可以通过在终端中键入以下命令来安装它:
sudo apt-get install nano
有很多要复制粘贴的代码。我建议复制粘贴它们而不是键入它们。您可以使用Ctrl + Shift + V将剪贴板的内容直接粘贴到终端上。
了解您的软件和环境
我们将使用LAMP在Ubuntu上安装WordPress。LAMP是包含L inux,A pache,M ySQL和P HP 的开源软件包的首字母缩写。
- Apache:这是我们将要使用的Web服务器软件。我们本可以使用LiteSpeed或NGINX,但它们的设置非常复杂。
- MySQL:这是我们的数据库软件。
- PHP:这是一种开放源代码的Web脚本语言,被广泛用于构建和运行动态网页。
至于本教程的OS环境,我正在运行Ubuntu 12.04 LTS x86,所有软件均已更新至最新版本。您可以自由使用任何版本的Ubuntu,无论是Lubuntu,Kubuntu还是Mubuntu,其过程应相同。要将软件更新到最新版本,请打开终端并输入:
sudo apt-get update
安装和配置软件:
1. Apache
sudo apt-get install apache2
按Y并开始安装。以下几行标志着成功安装的结束:
Setting up apache2-mpm-worker (2.2.22-1ubuntu1.2) ... * Starting web server apache2 [ OK ] Setting up apache2 (2.2.22-1ubuntu1.2) ... Processing triggers for libc-bin ... ldconfig deferred processing now taking place
2. MySQL
sudo apt-get install mysql-server libapache2-mod-auth-mysql php5-mysql
在安装过程中,将要求您设置MySQL的root密码。
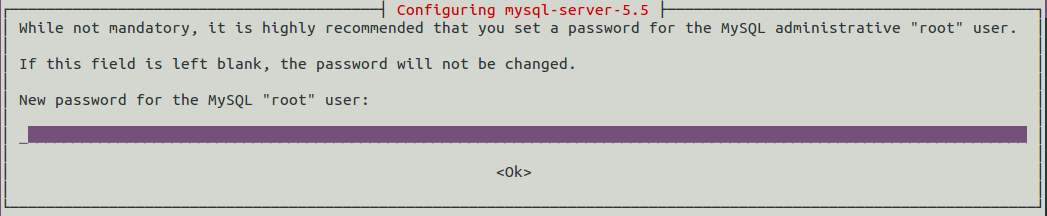
输入容易记住的内容。让我们使用“ qwerty”作为我们的密码。安装完成后,我们应该使用以下命令激活数据库:
sudo mysql_install_db
如果我们忘记了密码,以下信息非常方便。
sourav@ubuntu:~$ sudo mysql_install_db

[sudo] password for sourav:

Installing MySQL system tables...

OK

Filling help tables...

OK

To start mysqld at boot time you have to copy

support-files/mysql.server to the right place for your system


PLEASE REMEMBER TO SET A PASSWORD FOR THE MySQL root USER !

To do so, start the server, then issue the following commands:


/usr/bin/mysqladmin -u root password 'new-password'

/usr/bin/mysqladmin -u root -h ubuntu password 'new-password'


Alternatively you can run:

/usr/bin/mysql_secure_installation


which will also give you the option of removing the test

databases and anonymous user created by default. This is

strongly recommended for production servers.


See the manual for more instructions.


You can start the MySQL daemon with:

cd /usr ; /usr/bin/mysqld_safe &


You can test the MySQL daemon with mysql-test-run.pl

cd /usr/mysql-test ; perl mysql-test-run.pl


Please report any problems with the /usr/scripts/mysqlbug script!
这标志着MySQL数据库安装的结束。
3. PHP
sudo apt-get install php5 libapache2-mod-php5 php5-mcrypt php5-gd php5-xmlrpc php5-curl
有必要将php添加到目录索引中,以提供相关的php索引文件。这是我们第一次使用nano。
sudo nano /etc/apache2/mods-enabled/dir.conf
这将在同一终端窗口中打开nano。用以下文本覆盖dir.conf文件的内容:
<IfModule mod_dir.c>
DirectoryIndex index.php index.html index.cgi index.pl index.php index.xhtml index.htm
</IfModule>
按Ctrl + O保存,按Ctrl + X退出nano。
现在,我们创建一个测试php文件,以确保一切运行正常:
sudo nano /var/www/info.php
这应该是info.php文件的内容:
<?php
<h3 align="center">"Awesomeness has no charge" - Po the Panda</h3>
phpinfo();
?>
通过键入以下命令来重新启动Apache Web服务器:
sudo service apache2 restart
打开浏览器并输入以下URL:
http://localhost/info.php
并且您应该得到这样的东西:
到此结束我们的初步设置。
设置WordPress
第1部分:下载和安装
在终端中运行以下命令。
cd /var/www
sudo wget http://wordpress.org/latest.tar.gz
sudo tar -xzvf latest.tar.gz
这组命令下载并提取www目录(这是Apache Web服务器的基本目录)中的WordPress文件。WordPress的安装可在http:// localhost / wordpress下访问。
第2部分。创建一个新的MySQL数据库
现在,我们将创建一个新的名为“ wpubuntu”的MySQL数据库。记住,在本教程中,我们将根密码设置为“ qwerty”。让我们登录到MySQL终端:
mysql -u root -p
输入您的root密码,然后将打开MySQL终端,提示为“ mysql>”。
接下来,我们键入用于创建新数据库的MySQL命令:
CREATE DATABASE wpubuntu;
其次是:
FLUSH PRIVILEGES;
最后,我们通过输入以下命令退出MySQL终端:
exit
以下是整个过程的概述:
sourav@ubuntu:/var/www$ mysql -u root -p

Enter password:

Welcome to the MySQL monitor. Commands end with ; or \g.

Your MySQL connection id is 44

Server version: 5.5.29-0ubuntu0.12.04.2 (Ubuntu)

Copyright (c) 2000, 2012, Oracle and/or its affiliates. All rights reserved.


Oracle is a registered trademark of Oracle Corporation and/or its

affiliates. Other names may be trademarks of their respective

owners.


Type 'help;' or '\h' for help. Type '\c' to clear the current input statement.


mysql> CREATE DATABASE wpubuntu;

Query OK, 1 row affected (0.00 sec)


mysql> FLUSH PRIVILEGES;

Query OK, 0 rows affected (0.00 sec)


mysql> exit

Bye
第3部分。配置WordPress
在浏览器中打开以下URL:
http://localhost/wordpress
您应该看到此图像:
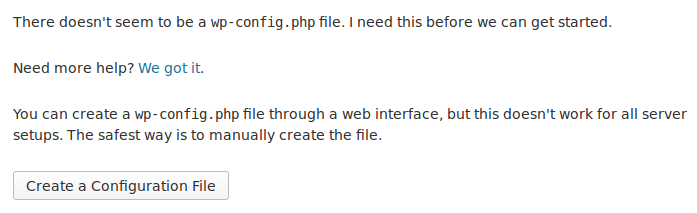
点击创建配置文件,然后让我们去的下一个步骤。在第三步中,输入以下详细信息:
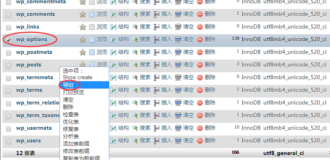
Database Name: wpubuntu
User Name: root
Password: qwerty (or whatever password you've used for the root user)
Database Host: localhost
Table Prefix: pxa_
点击提交。如果您正确地执行了这些步骤,则应该收到以下消息:
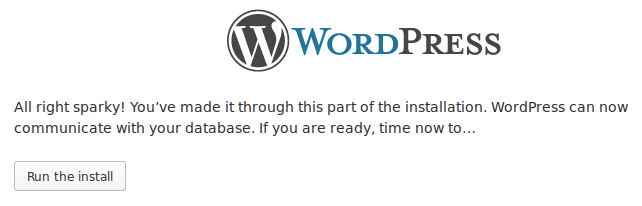
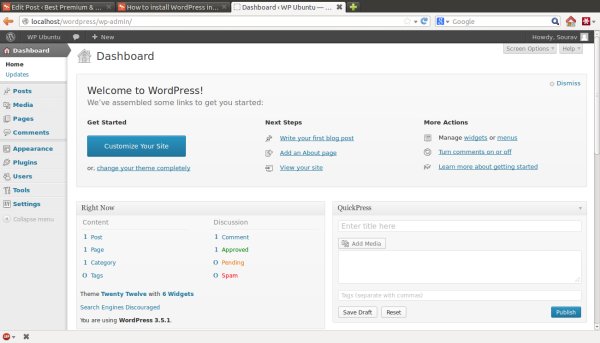
在接下来的步骤中,设置您的网站标题,用户和密码。我建议您取消选中“允许搜索引擎将该网站编入索引”复选框,因为我们不希望我们的离线/实验网站被搜索引擎抓取。
而且,您已经在Ubuntu上完成了WordPress的完全脱机安装!
祝您博客愉快!

微信扫描二维码联系我们!
我们在微信上24小时期待你的声音
提供外贸路由器设备产品,轻松翻墙,解答:WP主题推荐,WP网站建设,Google SEO,百度SEO,专业服务器环境搭建等!
需要提供WordPress主题/插件的汉化服务可以随时联系我们!另外成品WordPress网站以及半成品WordPress网站建设,海外Google SEO优化托管服务,百度SEO优化托管服务,Centos/Debian服务器WP专用环境搭建,WP缓存服务器搭建,我们都是你的首选,拥有多年WP开源程序服务经验,我们一直在坚持客户体验,没有最好,只有更好!
随机推荐